1.Getting Started
To use Avada Child themes for Theme fusion WordPress theme you must have a WordPress engine installed. We assume you have a working version of WordPress already up and running. We also encourage you to actively use the links below. These useful resources cover most of the general WordPress questions you may have:
- What is WordPress? Wikipedia and WordPress FAQ Read here!
- Tutorial on how to Install WordPress? Watch Video
- WordPress Lessons Visit Articles
2.Server Requirements
To use the Avada Child Themes for Theme fusion WordPress theme you need to have a WordPress 5.7 (or higher version) site with PHP 5.6 (preferably PHP 7 or higher) and MySQL 5.0+ running on your hosting server. If you’ve already installed WordPress on your server and your site is up, that’s great. For help regarding WordPress installation, please read through the WordPressWordPress Codex.
In addition, you must have the Avada Theme(Theme Fusion) 7.3 (or higher version) by Theme Fusion installed, preferably with the Avada Builder and Avada core Plugin as well.
Some more resources from WordPress Codex:
3.Theme Installation
Method 1: Theme Installation via Admin Panel
First of all, you need to download the avadachildtheme.zip file and unpack it somewhere on your machine
There you Get file data :
After unpack you Get list of folders
- Child Theme Files
- Documentation
- Manual Demo Content
- Licensing
Find your child theme in the child theme files folder.
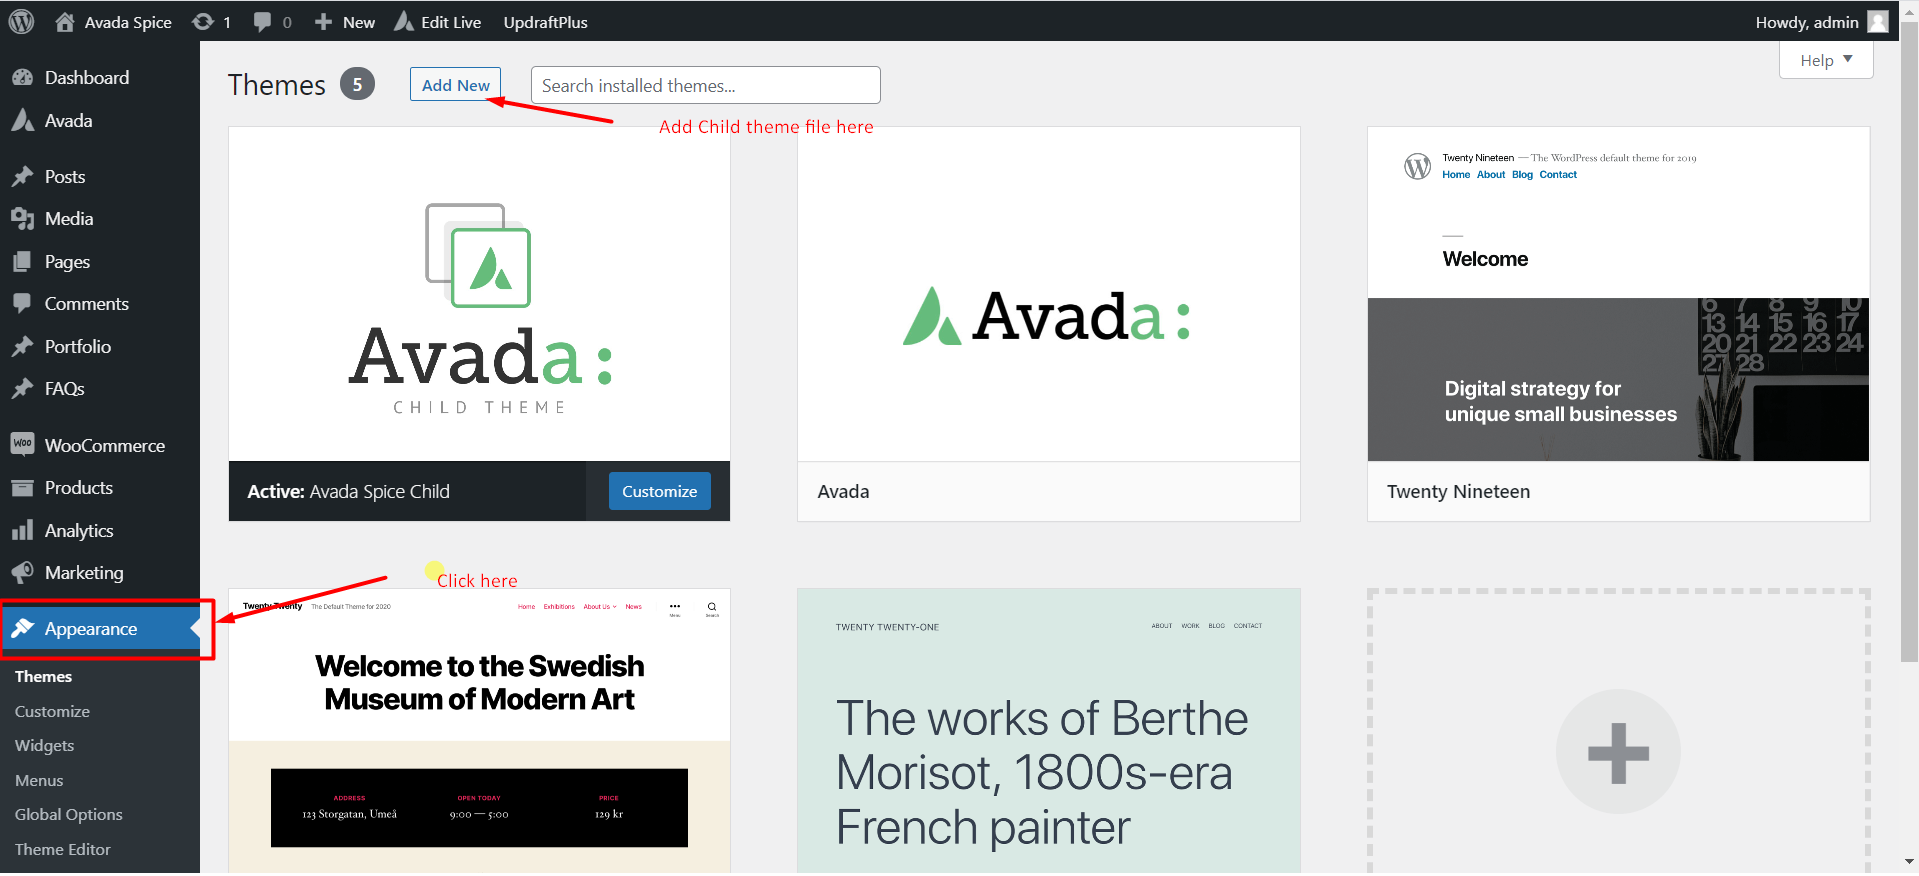
Now go to your site Dashboard > Appearance > Themes and click on Add New Theme
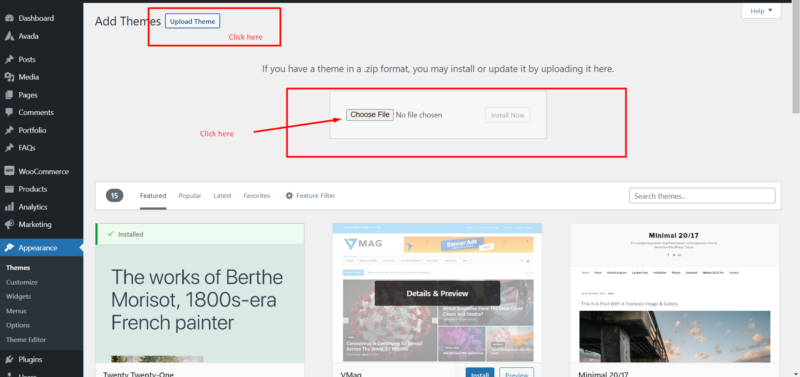
Now click on Upload Theme
Choose the zipped file named avadachildtheme.zip that you have unpacked from the downloaded name-child.zip file and click on the Install button, then wait for the installation process to complete.
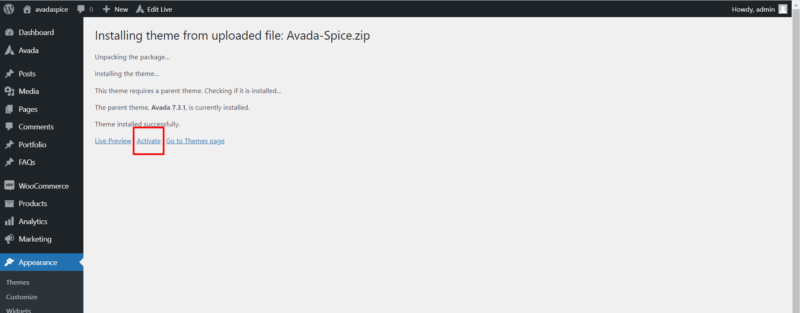
Once done, for the final step click on Activate.
Method 2: Theme Installation via Manuel FTP Upload
If you can’t install the theme via the first method, you can install manually by doing the following:
- Log in to your server using your FTP client ( FileZilla, Transmit, etc )
- Unzip the Avadachildthme.zip file you’ve extracted from the Name_child.zip file.
- Upload the extracted theme folder into wp-content > themes
- Activate the newly installed theme in Appearance > Themes
- Done
4.Plugins Installation
Plugins Installation
We have described the Required plugin on a theme description page.
- Avada page Builder
- Avada core Plugin.
- If the demo based on E-commerce then need to woo-commerce
Please check the Theme Description of what plugin is required for the demo.
5.Demo Import
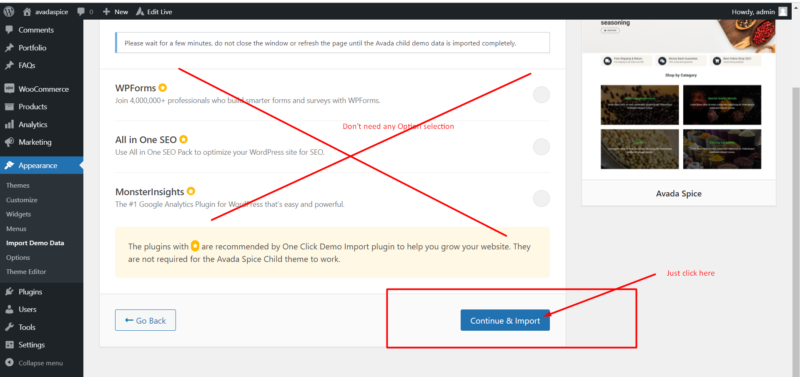
If you want to start off easy and import the entire Avada child demo site as-is, the theme comes with an extremely easy one-click demo import functionality that allows you to recreate the demo site on your WordPress installation in roughly 50 seconds.
Please note: it is highly recommended that you import the demo data onto a newly installed WordPress installation, rather than into an existing website, as this reduces the chance of something breaking to 0%
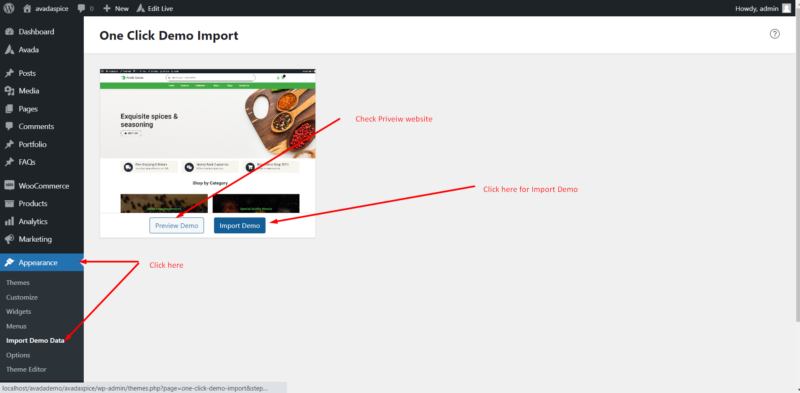
To start off, after you’ve activated the Avada child theme, navigate to the Appearance ->Import demo data link.
Next Screen
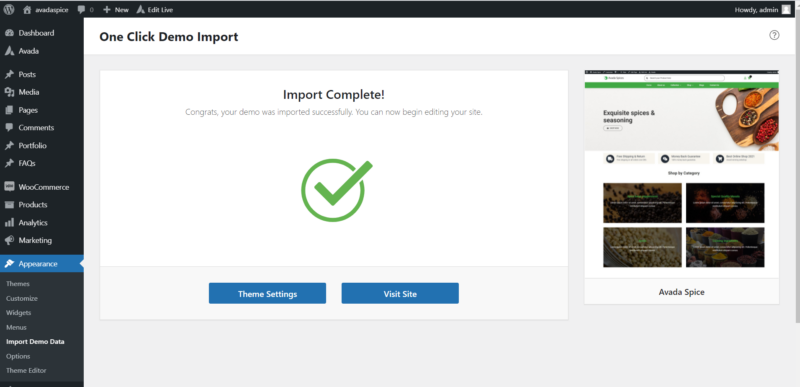
If everything went well, you should see the following message:
If you facing any issues contact: Help@avadathemes.com
6.Theme Options
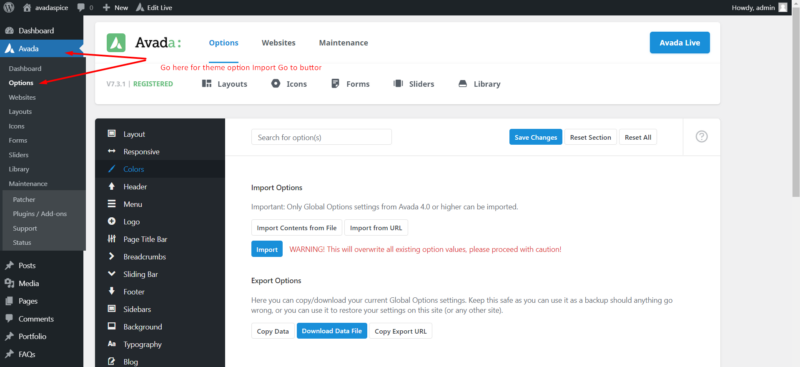
You need to import the Avada theme option setting manually:
Go Avada->Options-click
After Go On the bottom of the theme options:
Import Options:
There two options for Import theme Options choose anyone.
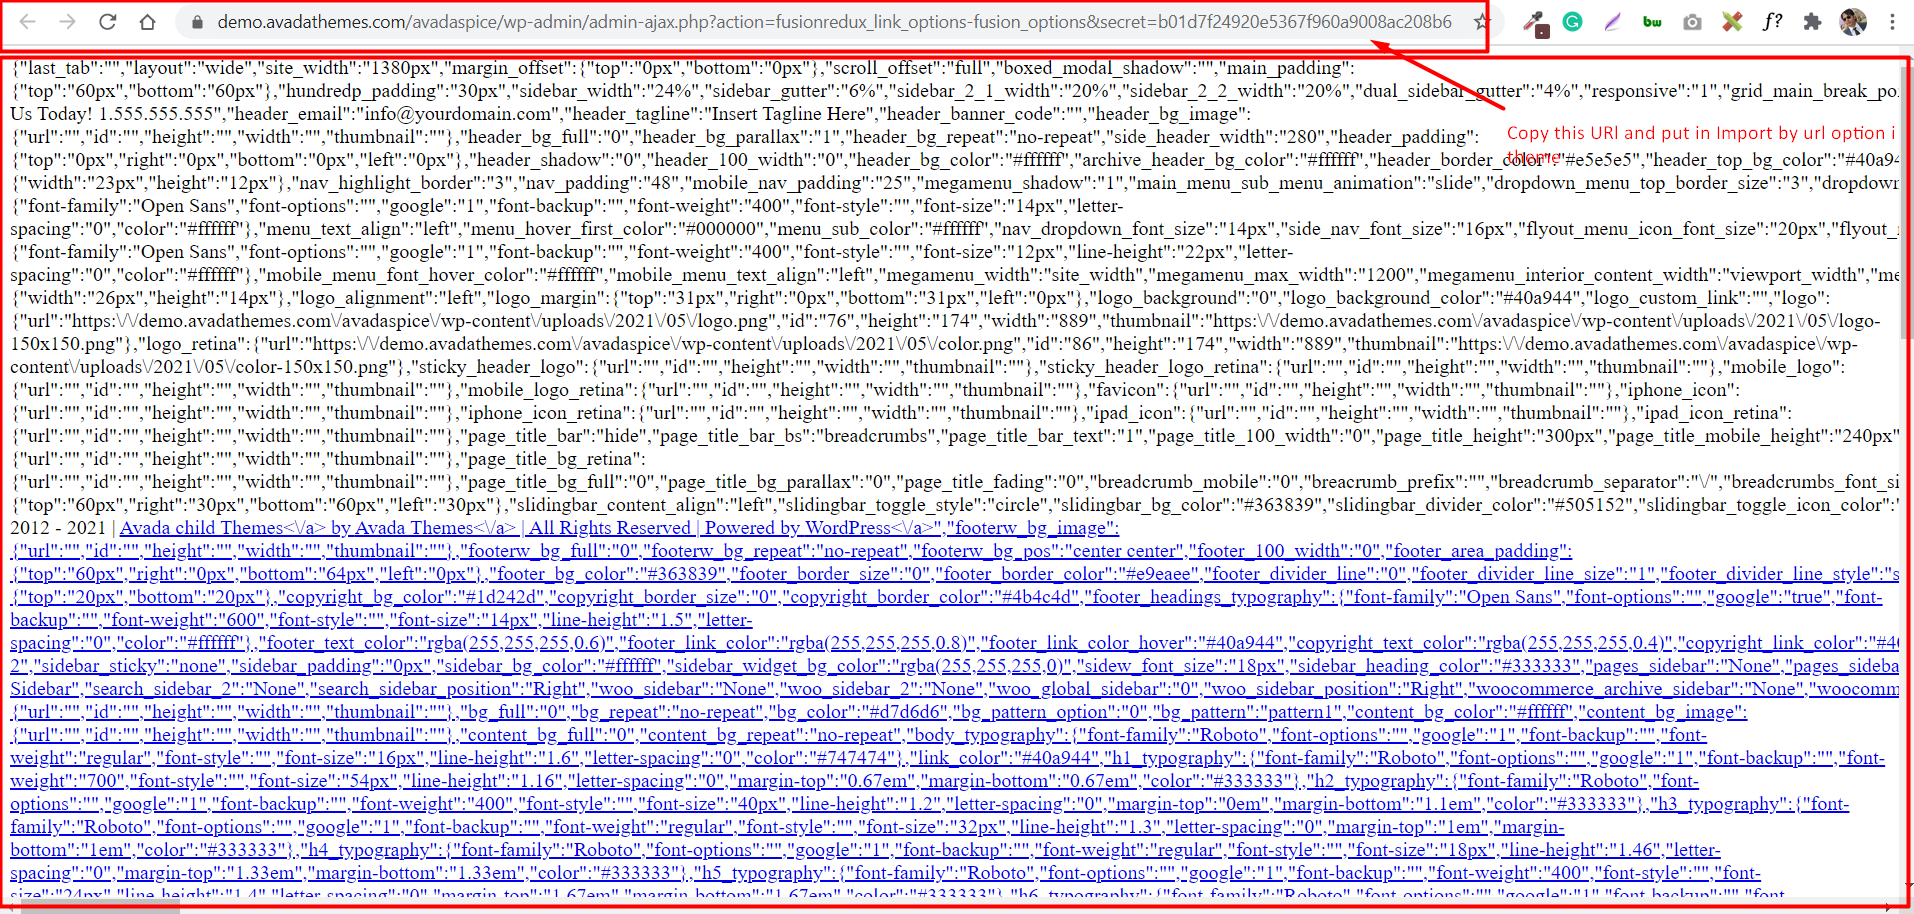
Go to unpack you Get a list of folders: -> Manual Demo Content ->fusion-options.html-> Just click this file:
After clicking its open in the browser
- Copy Url and Click -> Import from URL
- Ctr-A select complete code -:Import Contents from File
Just click on Import Button


